Marmalade is a fruit preserve made from the juice and peel of citrus fruits boiled with sugar and water. Despite originating in Portugal, and most commonly made from Spanish Seville oranges, marmalade is now seen as a peculiarly British obsession. And in Britain, January is the month to make marmalade.
I’ve been making my own marmalade for ten years or more. I had tried commercial marmalade over the years and never been that impressed. Too sweet, little flavor and a token amount of thinly shredded peel which added nothing to the experience. No thanks, I’ll stick to jam. Then I tried homemade marmalade for the first time and was blown away.
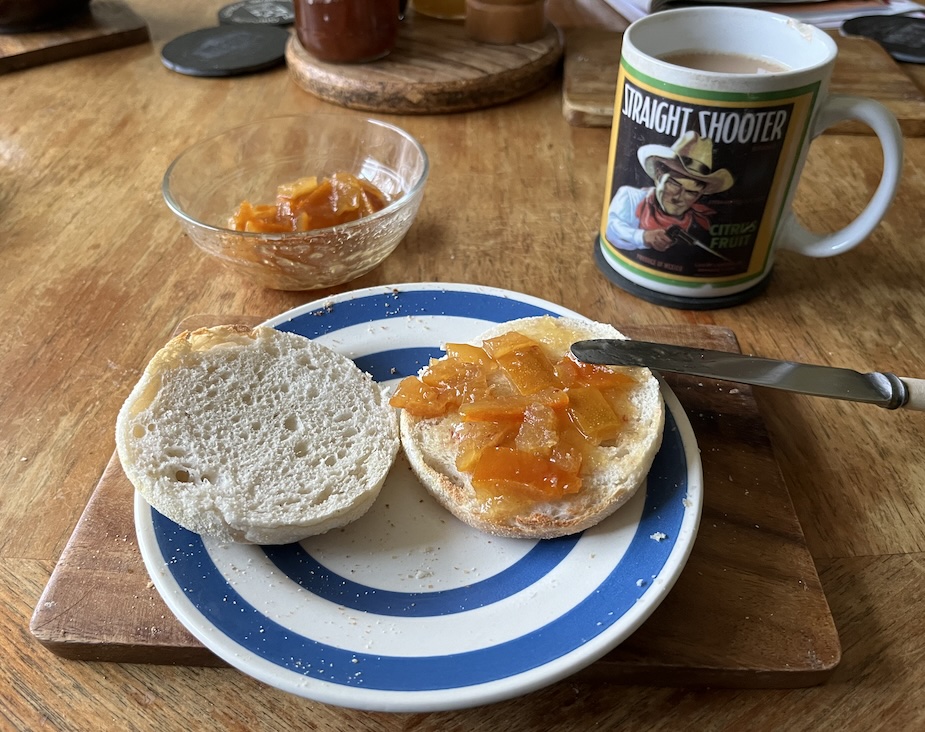
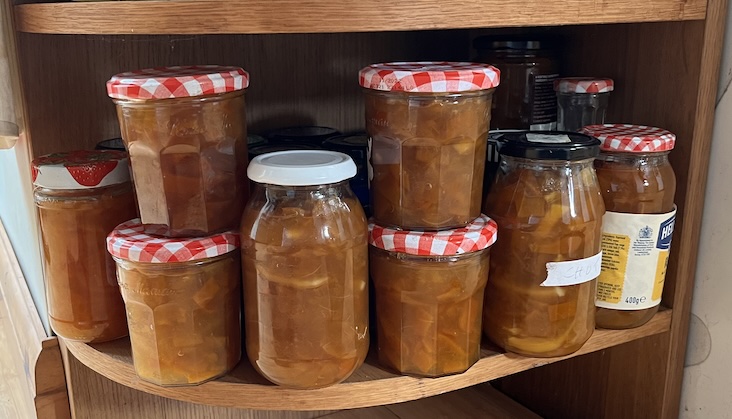
Marmalade is now a breakfast staple for me, spread on toast or an english muffin. I get through two jars a month, which means I need to make 25 jars to be sure I have enough for a year.
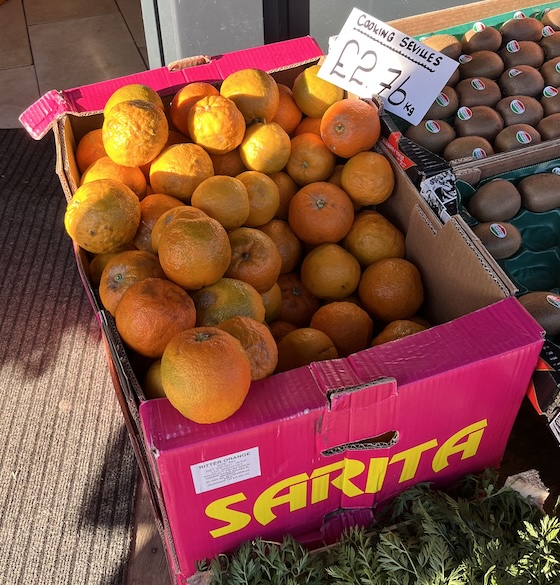
In Britain, Seville oranges are only available in the shops after Christmas and then through to the end of January. Why? Because that’s when Britons like to make their marmalade. Why do Britons make their marmalade in January? Because (a) it’s traditional and (b) that’s the only time you can get Seville oranges.
Which means January is a mad rush of boiling and chopping and sterilizing jars, making sure I’ve made enough before the season ends.
Ingredients
The ingredient list is short and to the point
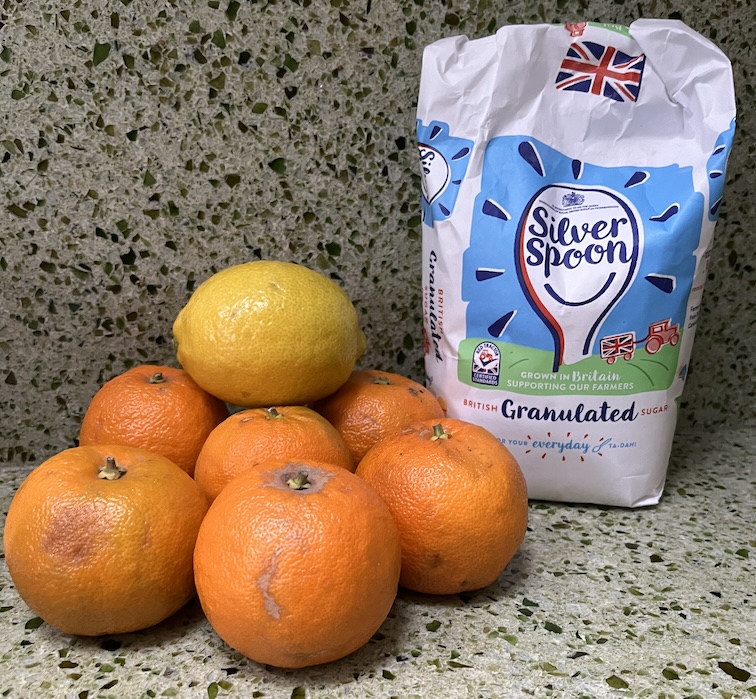
- Seville Oranges (as many as will fit in a single layer in your pan)
- A Lemon
- Sugar
Seville Oranges are used for cooking so should come unwaxed. I use six per batch of marmalade which makes 4-5 jars. I add sugar to taste rather than measuring. The usual rule of thumb is a 1:1 ratio by weight with the oranges.
Equipment
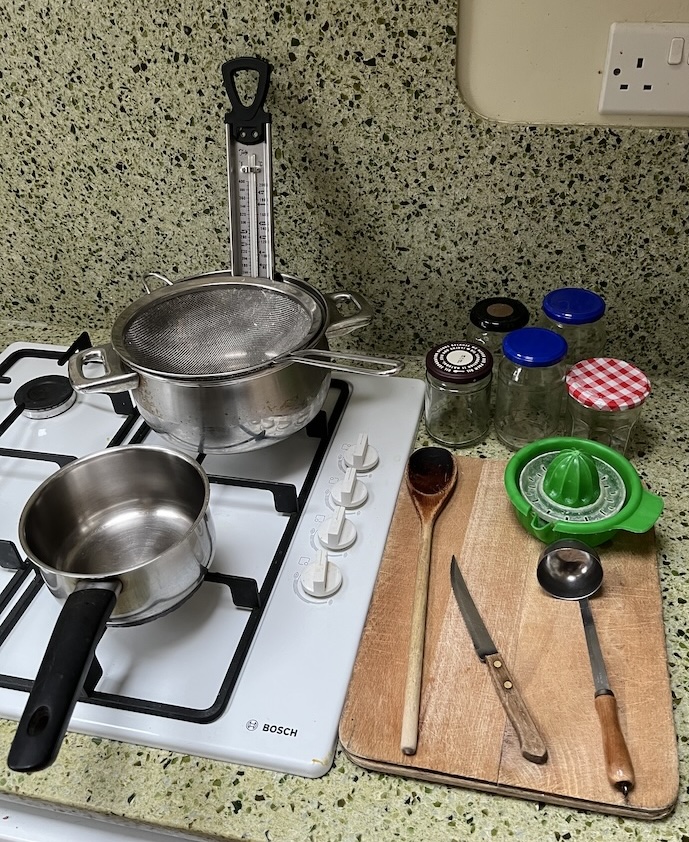
Finally, we’ve reached the “gear” part of the post. You will need
- A large pan (with a lid) to boil your marmalade in
- A small pan for pips and stringy bits
- A sieve
- A cooking thermometer. I tried using fancy electronic thermometers but they all broke within a few months. So I went back to an old fashioned analog one.
- A lemon squeezer
- A chopping board
- A wooden spoon
- A small kitchen knife
- A small ladle or equivalent utensil for transferring hot marmalade from the pan into your jars.
- Enough jars to hold your marmalade. Better to have too many than too few. Reuse whatever jars you have rather than buying new ones.
Method
The recipe I use is based on one in How To Eat by Nigella Lawson. I make each batch of marmalade over two days to avoid being scalded by hot oranges, and because I’m lazy.
Day One
Clean the oranges. Remove any vestige of stalk and rub any dirt off the skin with cold water. If you’ve somehow ended up with waxed oranges, you will need to remove the wax.
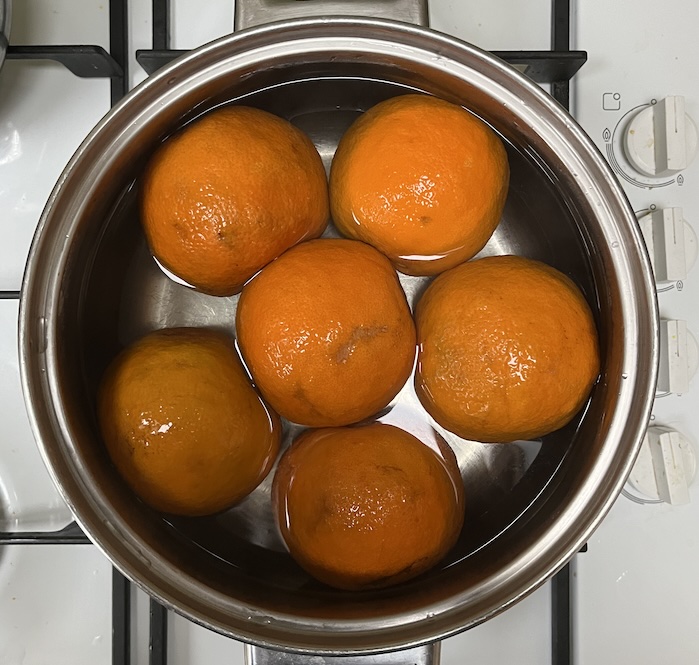
Arrange the oranges in a single layer in the large pan. You may have to juggle them around to get them to fit. Add enough water to half cover the oranges, so that they start to bob up from the bottom of the pan.
Cover the pan with the lid and simmer the oranges for two hours. I bring them up to the boil then turn the hob down to its lowest setting. Most of the time I remember to come back two hours later and turn them off. No harm done if you boil them for longer.
Day Two
Remove the oranges from the pan. I arrange them on the upturned lid. You should be left with rather less water than you started with, mixed with juice from the oranges. Do NOT throw it away.
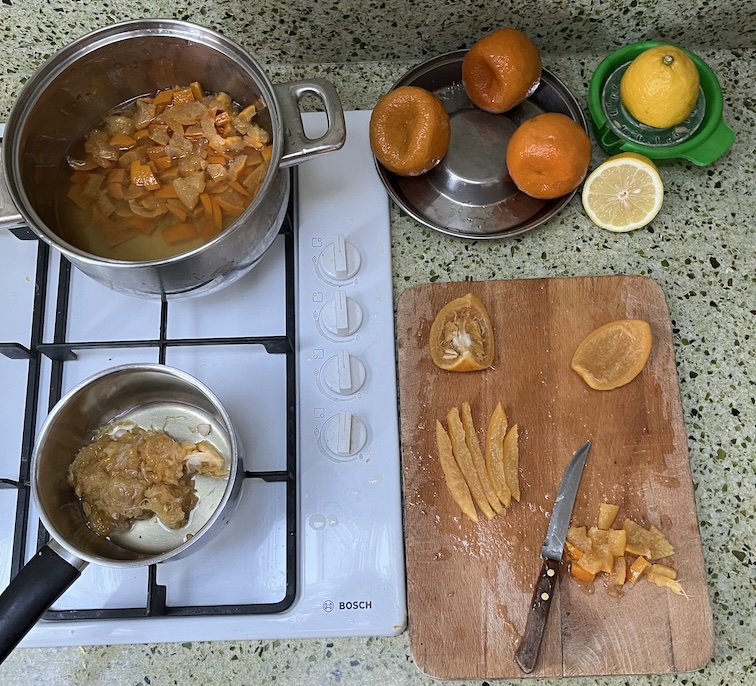
Chop each orange into quarters. Use your hand to scoop out the pips and any stringy bits of membrane and pop them into the small pan. Cut the orange peel and any attached flesh into strips of whatever width and length you fancy. I like them chunky. Throw the strips back into the big pan.
Squeeze the lemon. Add the juice to the big pan and any pips to the small one.
Marmalade relies on the pectin in the oranges to set the jam. The acid in the lemon juice is meant to activate the pectin. Most of the pectin is concentrated in the pips. The next step extracts it.
Add just enough water to the small pan to cover the pips and pulp. Boil hard for two minutes. You should notice the mixture thicken slightly as the pectin is extracted.
Put the sieve over the large pan and pour the contents of the small pan into the sieve.
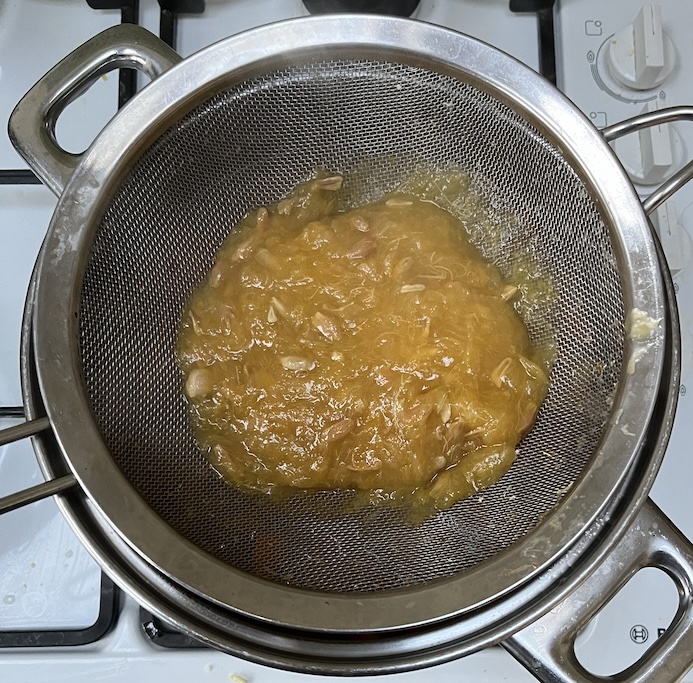
Use the wooden spoon to stir the mixture and help pass the liquid and pulp through the sieve. Make sure you don’t press too hard. You don’t want to crush the now fragile pips. They don’t taste nice. Keep going until you’ve had enough or there are just pips and stringy bits of membrane left.
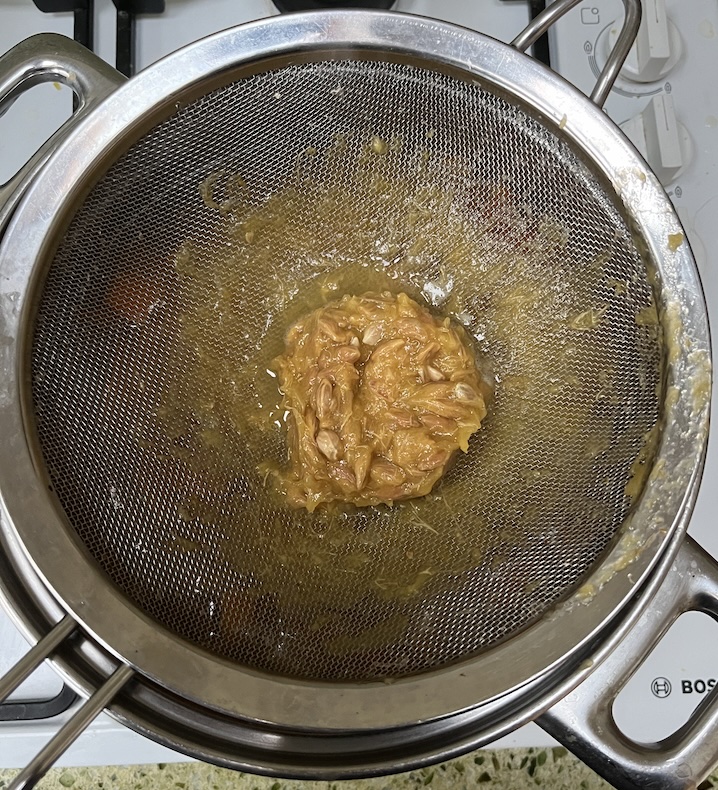
Scrape the last of the pectin rich mixture from the bottom of the sieve into the large pan, then discard what’s left in the sieve.
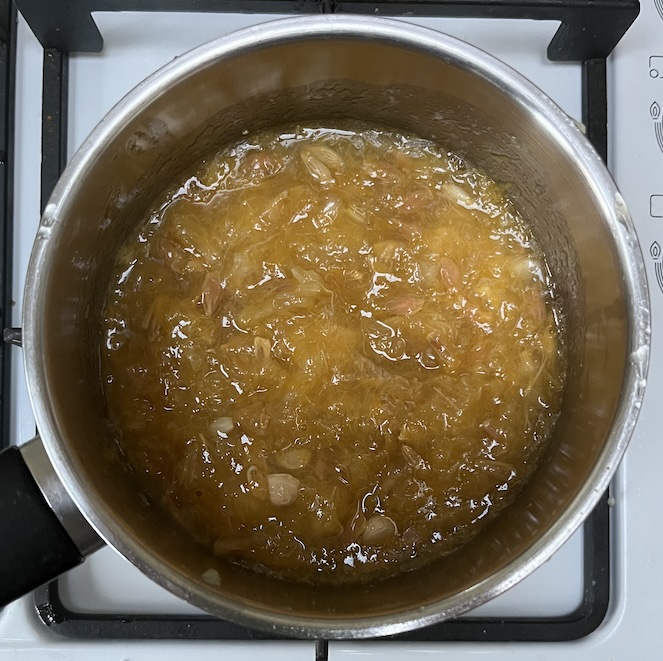
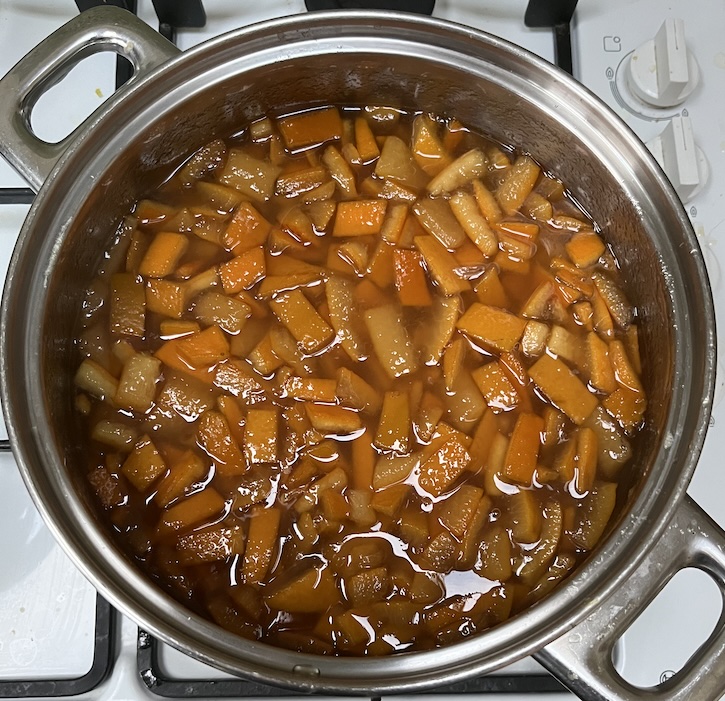
Heat the large pan. Resist the temptation to add more water. It’s surprising how much the volume and liquidity increases once you add the sugar. The more water you have, the longer you’ll need to simmer and reduce the jam before it’s ready.
Give everything a good stir and then start adding the sugar, a bit at a time. Stir until you can feel that all the sugar has dissolved. Taste and repeat as needed.
Now for the tricky bit. You need to simmer the mixture until it’s ready. It’s ready if it sets once cooled. This is where the cooking thermometer comes in. You need to reach jamming point, which is 104 degrees celsius.
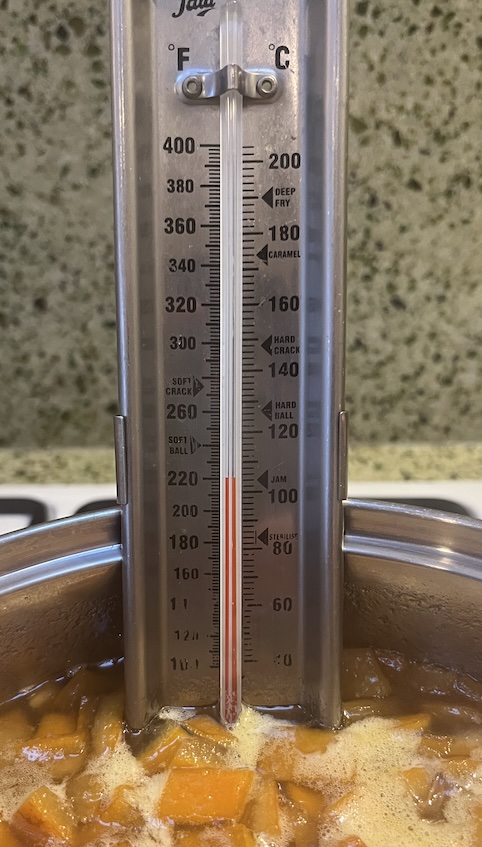
I’ve learnt the hard way that jamming point is a necessary but not sufficient condition for the jam to set. Once there, you have anywhere from a few more minutes to an hour of simmering left. If the temperature goes much above jamming point, you’ve left it too long and you’re on your way to making orange flavor toffee.
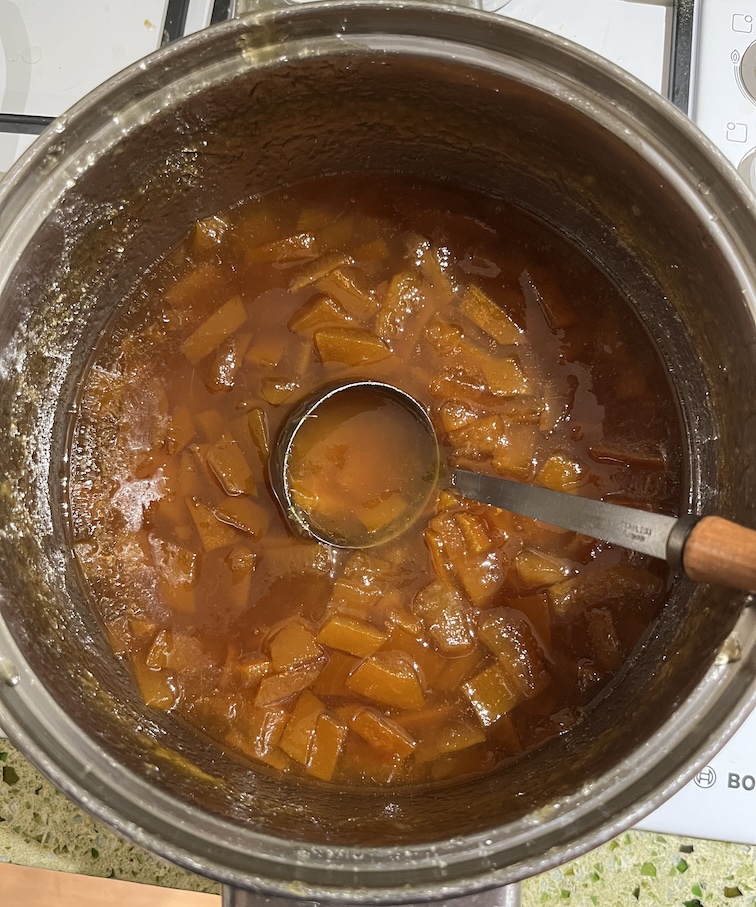
Everyone has their own test for when it’s ready. My father-in-law claims he can tell by the way the simmering sound changes and how the marmalade falls off the spoon. I put a drop of mixture on a cold saucer, let it cool, then draw my finger through it. Tip the saucer up. If the edge of the jam holds firm and stays in place it’s ready. If it runs, it’s not.
Test every five to ten minutes. If you started with a lot of water, the volume will need to reduce considerably before it’s ready. Be careful towards the end as the jam may start to stick to the bottom of the pan.
While all that’s going on, you can prepare the jars. Remove the lids, wash both jars and lids using hot foamy water, and rinse well. Put the jars (but not the lids) into the oven and heat to 100 degrees celsius, then turn the oven off.
Heating the jars is meant to sterilize them and warm them up to avoid the glass cracking when you fill them with scalding hot marmalade. I’m not convinced it makes any difference but somehow I find myself doing it anyway.
Once the marmalade is ready, ladle it into the warm jars and close the lids tightly.
Results
Six batches later and I’ve secured my supply of marmalade for the year.
I hope you enjoy your breakfast as much as I enjoy mine.